Tasks Beta 📝
The Tasks Beta tab utilises a mining sequence file, such as the physiclas, along with Plugins to create the mining sequence. In addition, custom inputs, which may be required for testing certain situations in the simulation, can be created and displayed. The current Task Beta comprises of several tabs which are outlined below.
Mining
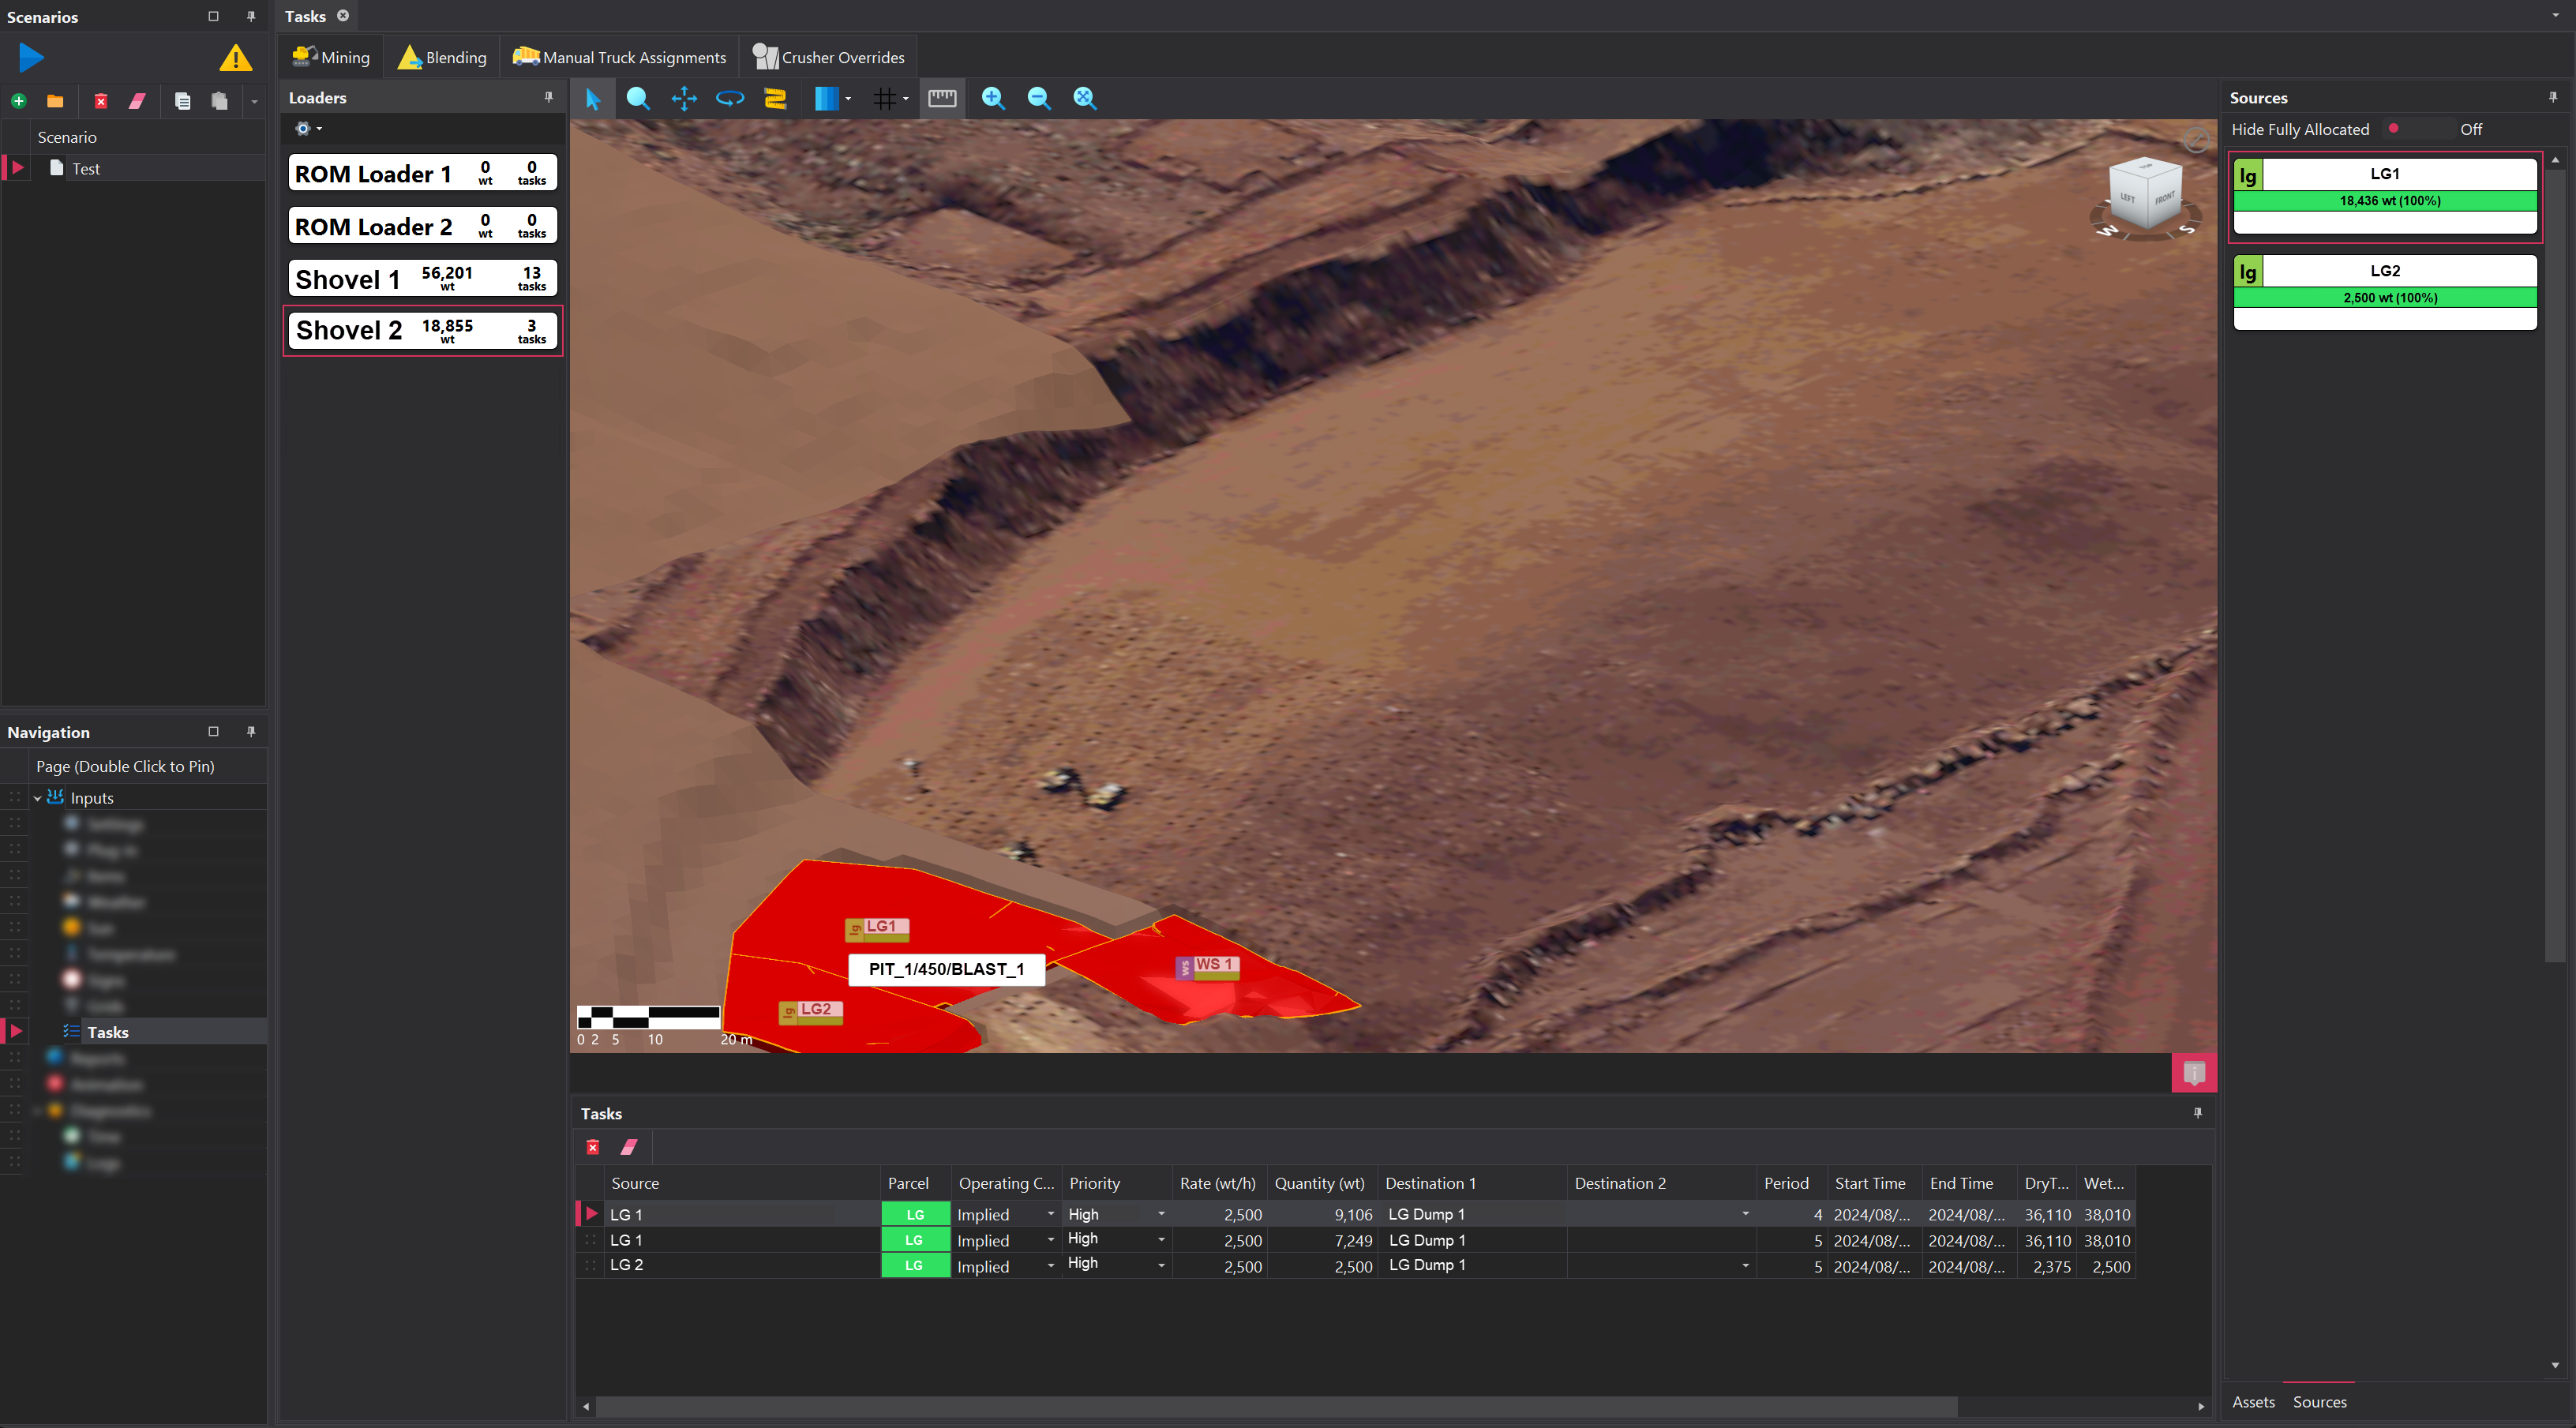
Mining Tasks for load units are generated from plugins automatically. Manual placement of source and destiantion blocks, which is a requirment of Tasks Alpha, is not required. The Mining tab has several areas which are discussed below.
1. Loaders
Located on the left-hand side of the Mining tab, the Loaders panel shows the loaders that have been added into the project. The software will force the creation of the loaders that are present in the mining sequence file in the Items step if using Tasks Beta.
Hitting the little cog at the top will cause the plugin to assign mining tasks to the units. The tasks will be assigned based on the mining sequence that was loaded in.
2. Sources
Located on the far rigth-hand side, the Sources panel shows the source blocks that are available to be assigned to load units. They appear as cards and show information relevant to the block. The contents of this card is customisable from the Plugin. Sources can be dragged from the list to a particular tasks list of a load unit.
3. Tasks
The Tasks table shows the task list for each load unit. Each task has some core properties, which are outlined below, along with the ability to add custom properties through plugins.
| Property | Description |
|---|---|
| Source | The origin location of the material for the task. Options are populated from Source and Destinations step. |
| Destination | The destination of the material. Options are populated from Source and Destinations step. |
| Parcel | The parcel type being moved in the task. |
| Quantity | The quantity of material, in wet tonnes, to be mined from the source and delivered to the destination. |
🖱️ Double clicking on a task will reposition the viewport camera to show the soruce as well as highlighting it yellow.
Blending
The Blending tab allows sources to be scheduled to crusher hubs at defined ratios. This acheived through the following items
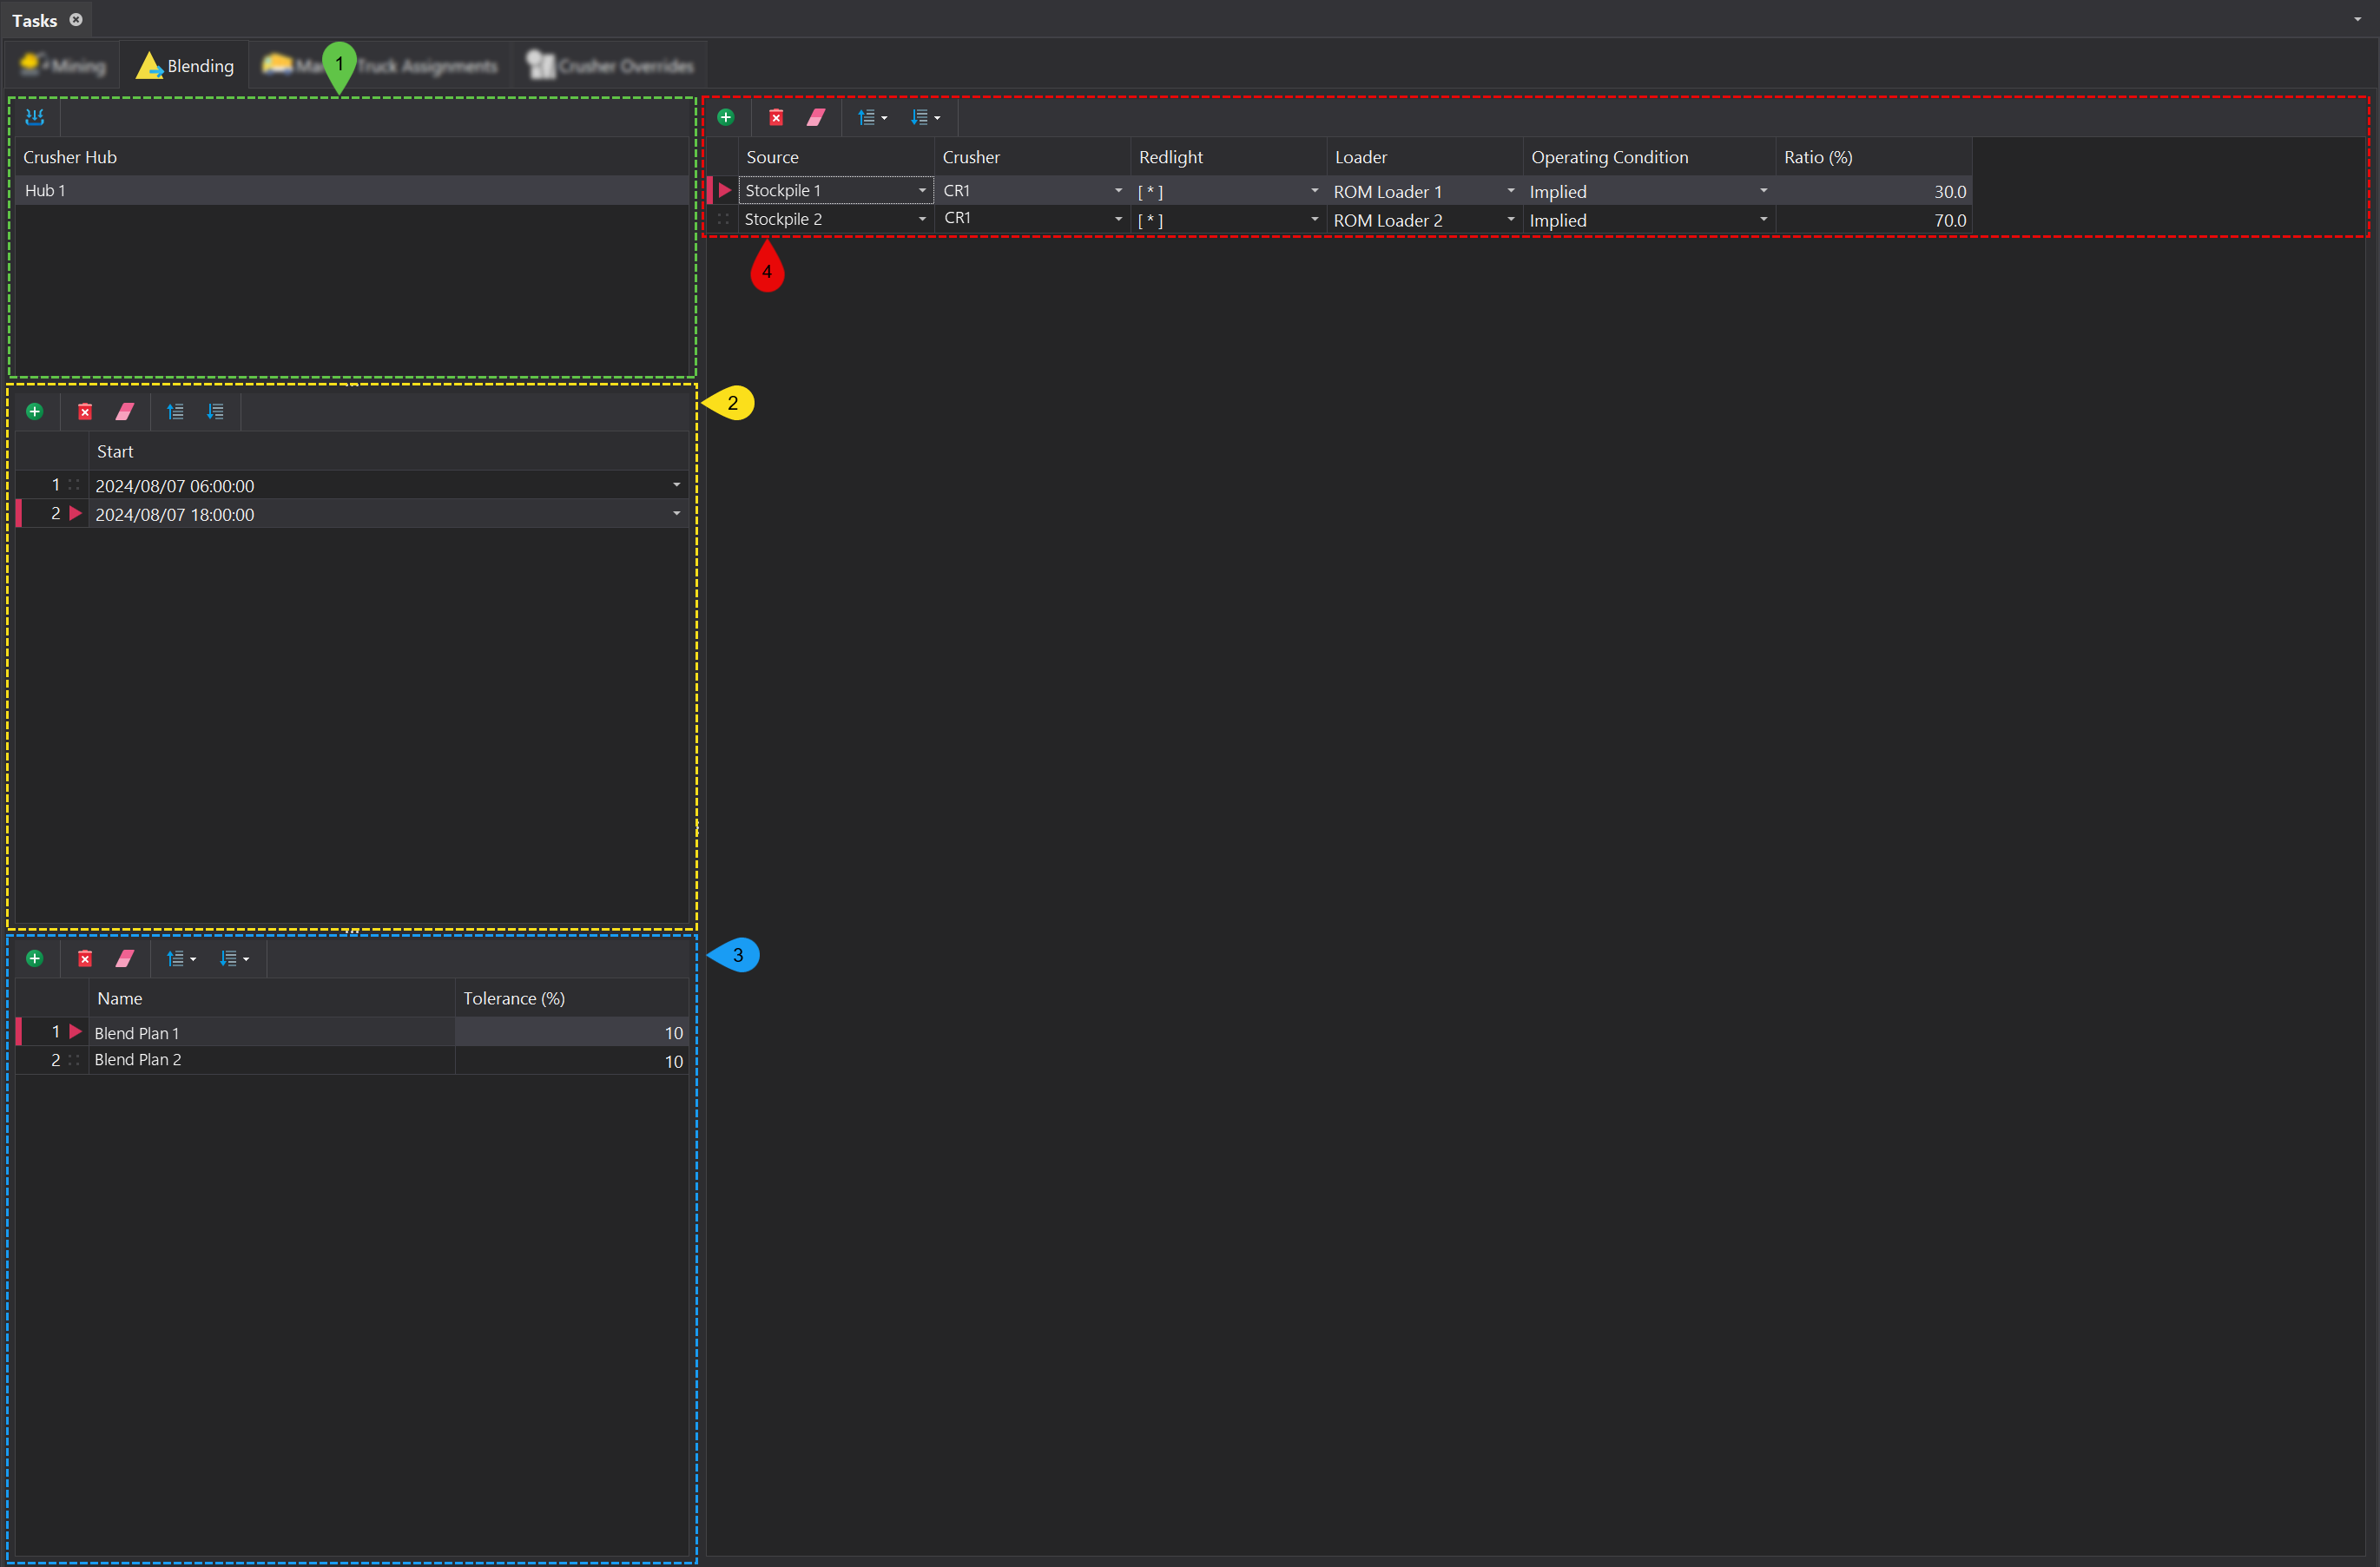
1. Crusher Hub
The Crusher Hub which the blend tasks are assigned to. Crusher Hubs are specified in the Lists step and are assigned to crushers in the Items step.
2. Blend Interval
A Blend Interval represents a interval of time when certain Blend Plans are active. A Blend Interval could represnt a shift, or the duration left on a particular product build.
Blend Intervals are managed using the toolbar located at the control. More information on the functions within the toolbar can be found in the Common User Controls page. Each instance must have the following properties specified:
| Property | Description |
|---|---|
| Order | The order of the blend plan, which can be managed by dragging and dropping entries. Naturally, the blend plans should be ordered chronologically. |
| Start Time | The time at which the blend plan becomes active. |
3. Blend Plans
Blend Plans outline the feed options avaible during the Blend Interval. A Blend Plan contains the combination of source blocks, along with their respective ratios, that supply material to the Crusher Hub. Each Blend Plan is listed in priority order and can be managed by dragging and dropping entries.
Blend plans can be managed using the tool bar located at the top of the panel. More information on the functions within the toolbar can be found in the Common User Controls page. Each instance must have the following properties specified:
| Property | Description |
|---|---|
| Priority | The priority of the blend plan, managed by dragging and dropping entries. Blend plans should naturally be ordered chronologically. |
| Name | The name assigned to the blend plan. |
| Tolerance | The acceptable deviation from the specified feed ratio. For example, a 10% tolerance on a 30% feed ratio would range from 27% to 33%. |
4. Blend Sources
For each Blend Plan, the source blocks must be defined. Each source within the blend plan has the following properties.
| Property | Description |
|---|---|
| Source | The name of the stockpile or excavation block that is part of the blend plan. |
| Crusher | The crusher to which the source material will be sent. |
| Redlight | An optional stockpile where trucks will dump material if the crusher goes down. Currently not supported. |
| Loader | The load unit responsible for moving the material. |
| Operating Condition | The Operating Profile to be applied to the loader. |
| Ratio | The proportion of the source block’s contribution to the crusher feed. All ratio values must sum to 100%. |
Manual Truck Assignments
The Manual Truck Assignment tab allows the Dispatch assignment for a truck to be manually overriden.

Manual Truck Assignment entries are managed using the toolbar located at the top of the page. More information on the functions within the toolbar can be found in the Common User Controls page. Each instance must have the following properties specified:
| Property | Description |
|---|---|
| Date/Time | The date and time when the manual assignment should be triggered. |
| Truck | The name of the truck that will receive the manual assignment. |
| Loader | The loader to which the truck will be reassigned, if applicable. |
| Destination | The destination to which the truck will be reassigned during the manual assignment. |
| Max Repetitions | The maximum number of times the manual reassignment should occur. |
| Max Duration | The maximum duration (in hours) for which the manual reassignment will remain active. |
🕗 If you move the animation slider to a specific point in time and add a manual assignment, the Date/Time property will automatically be populated based on the slider's position in the Animation tab.
Crusher Overrides
The Crusher Overrides step enables you to schedule specific time periods during which the crusher operates at a defined rate.
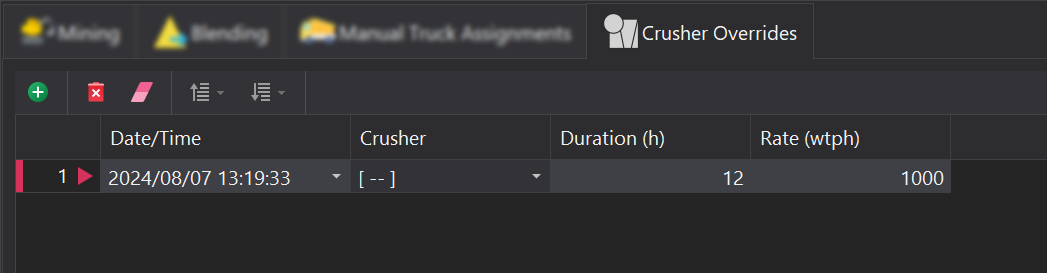
Crusher Override entries are managed using the toolbar located at the top of the page. More information on the functions within the toolbar can be found in the Common User Controls page. Each instance must have the following properties specified:
| Property | Description |
|---|---|
| Date/Time | The specific date and time when the crusher override period begins. |
| Crusher | The name of the crusher affected. |
| Duration | The length of time for which the override is applied. Example: 4 hours. |
| Rate | The operating rate of the crusher during the override period, typically measured in tonnes per hour. Example: 500 wt/h. |
🕗 If you move the animation slider to a specific point in time and add a manual assignment, the Date/Time property will automatically be populated based on the slider's position in the Animation tab.