Simulate Scenario
In the Scenarios pane, click on the Add Item icon to add a new Scenario and give it a name.
Select the created scenario and use the Navigation Pane to configure the scenario inputs and parameters.
For the default simulation, the main inputs to configure are:
- Settings
- Items
- Sun
- Sign
- Tasks
- Report
Input Settings
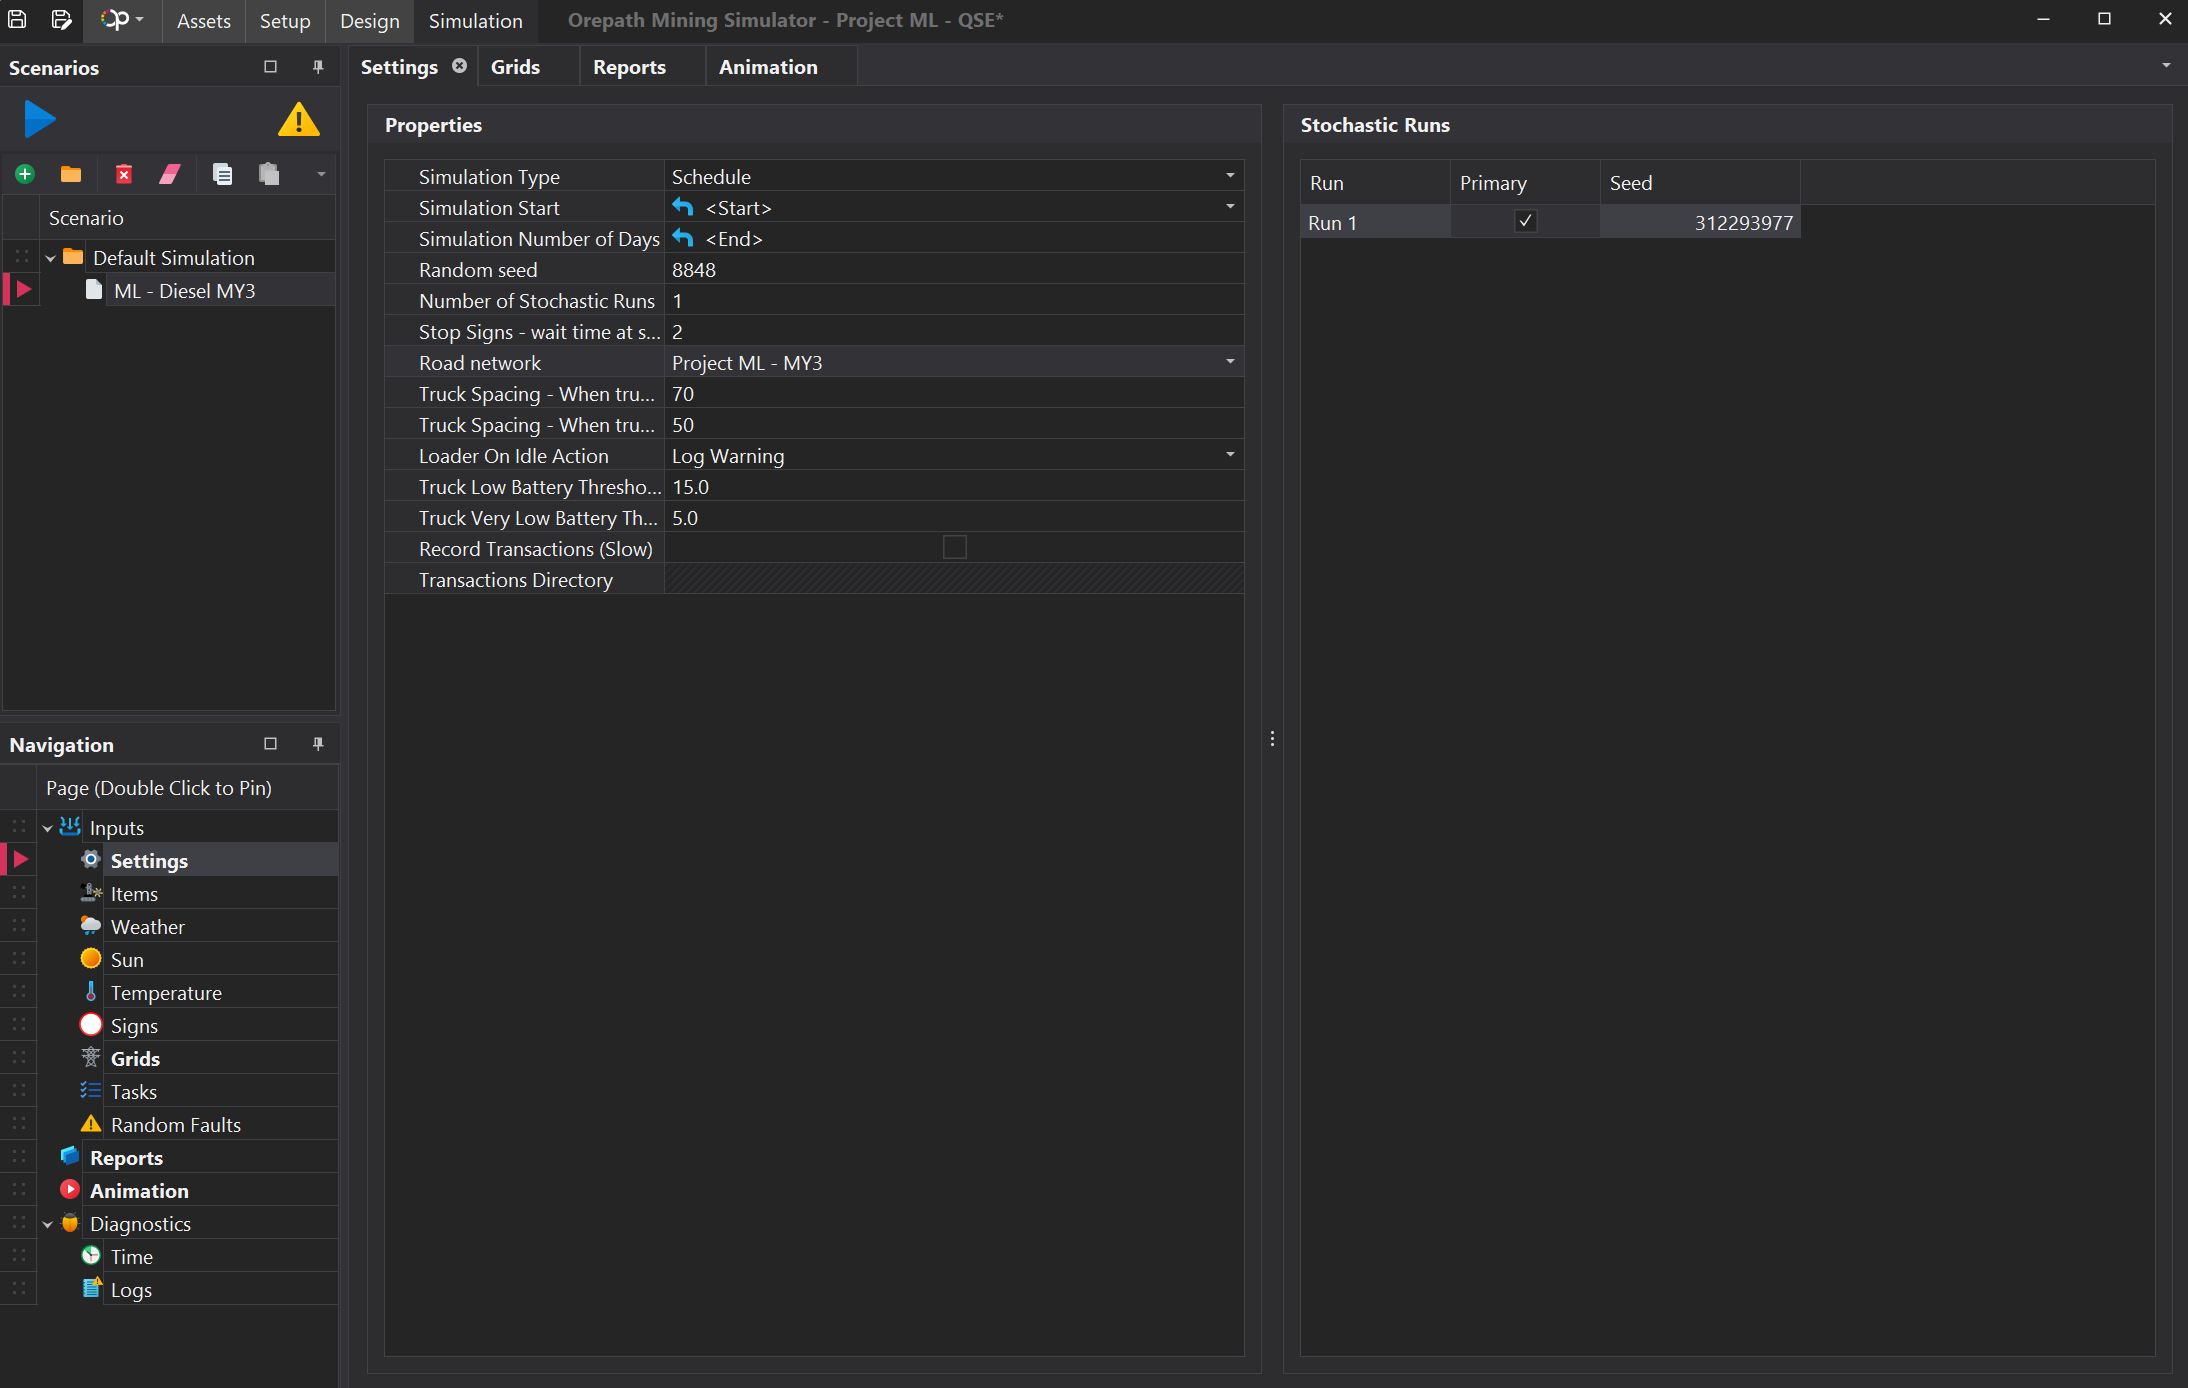
In the Input Settings, set:
- Simulation Type to Schedule.
- Simulation Start and the Simulation Number of Days fields are set to Start and End.
- Ensure that the Road Network is set to the network that you have configured.
Once configured, the Input Settings for the scenario should look similar to the image displayed below.
Items
In the Items, you will need to add a certain number of trucks, loaders and Fixed equipment to the simulation.
Remember, in the Setup tab, you only defined the types of equipment that may be present in your scenarios. In the Simulation tab, you will add the applicable equipment to the specific scenario.
Trucks
Expand the Mobile folder in the Type pane and click on Trucks.
- Click on the Add Item icon in the equipment pane to open the Choose Units dialogue box
- Use Shift + Left Click to select all trucks, click a check box to enable all units and click OK.
- Configure the first truck to have the following settings:
- Roster is set to Full Time.
- Unplanned Set is set to Truck Set.
- Unplanned Available is set to 100%.
- Refuel/Recharge Strategy is set to At Bowser.
- Fuel Level is set to 100%.
- Initial Location is set to All Go Lines.
- Idle Location is set to All Go Lines.
- Hold down Shift & Left Click to select the remaining trucks in the list.
- Hold down Ctrl & Right Click any unpopulated columns for the remaining trucks.
Loaders
Click on the Loaders item inside the Mobile folder.
- Click on the Add Item icon in the equipment pane to open the Choose Units dialogue box
- Use Shift + Left Click to select all loading units, click a check box to enable all units and click OK.
- Ensure that all loaders have the following settings:
- Roster is set to Full Time.
- Unplanned Set is set to Loader Set.
- Unplanned Available is set to 90%.
- Refuel/Recharge Strategy is set to Magic.
- Fuel Level is set to 100%.
- Idle Location is set to All Go Lines.
- Initial Locations as per below:
- 1x R9600 at Pit 1
- 1x R9600 at Pit 3
- 1x R9400 at Pit 2
- 3x Loaders at the ROM
Fixed Items
Add the Jaw Crusher and ensure that the Crusher Type is set to Jaw. Assign the Crusher Set in the Unplanned Availability column.
Continue down the list and add the Go Lines, Bowsers and Workshop items.
Sun
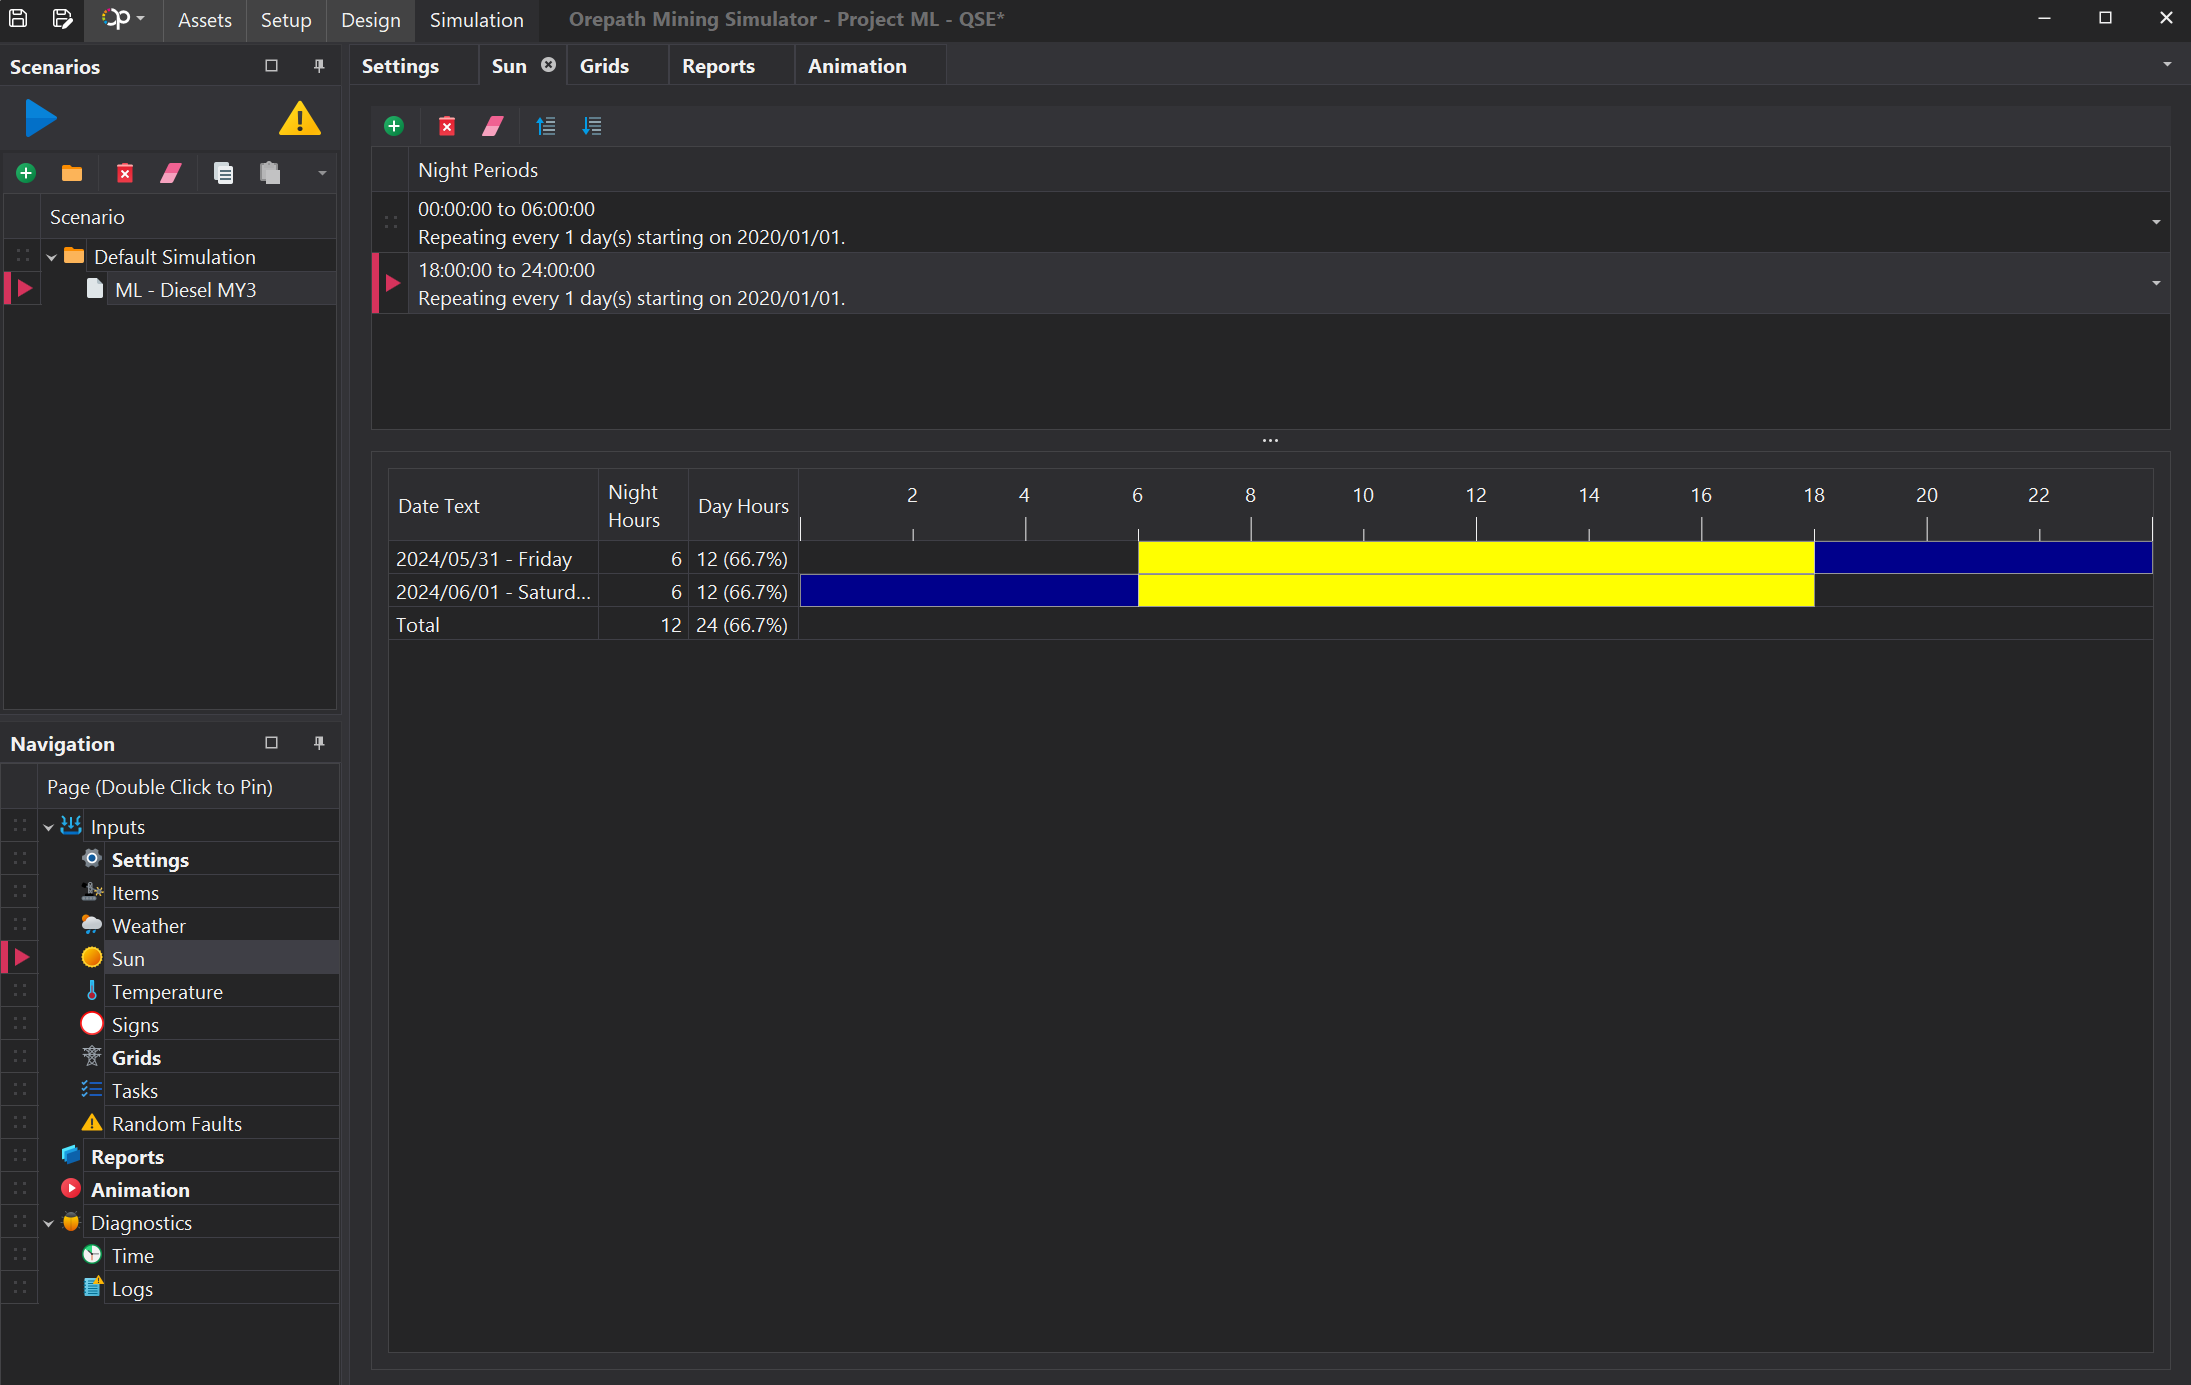
In the Sun settings, add two Night Periods by clicking on the Add Item button twice.
Add periods of night-time that span from 0000 to 0600 and 1800 to 2400.
Once configured, the Sun setting should look as per the image below.
Signs
In the Signs setting, you will be presented with a configuration table for the Speed Signs defined in the Setup Settings.
Set the speeds limits for the Fast and Slow zones.
- Fast Zones - 50kph in Dry Conditions during the Day/Night.
- Fast Zones - 40kph in Wet Conditions during the Day/Night.
- Slow Zones - 25kph in for all Conditions during the Day/Night .
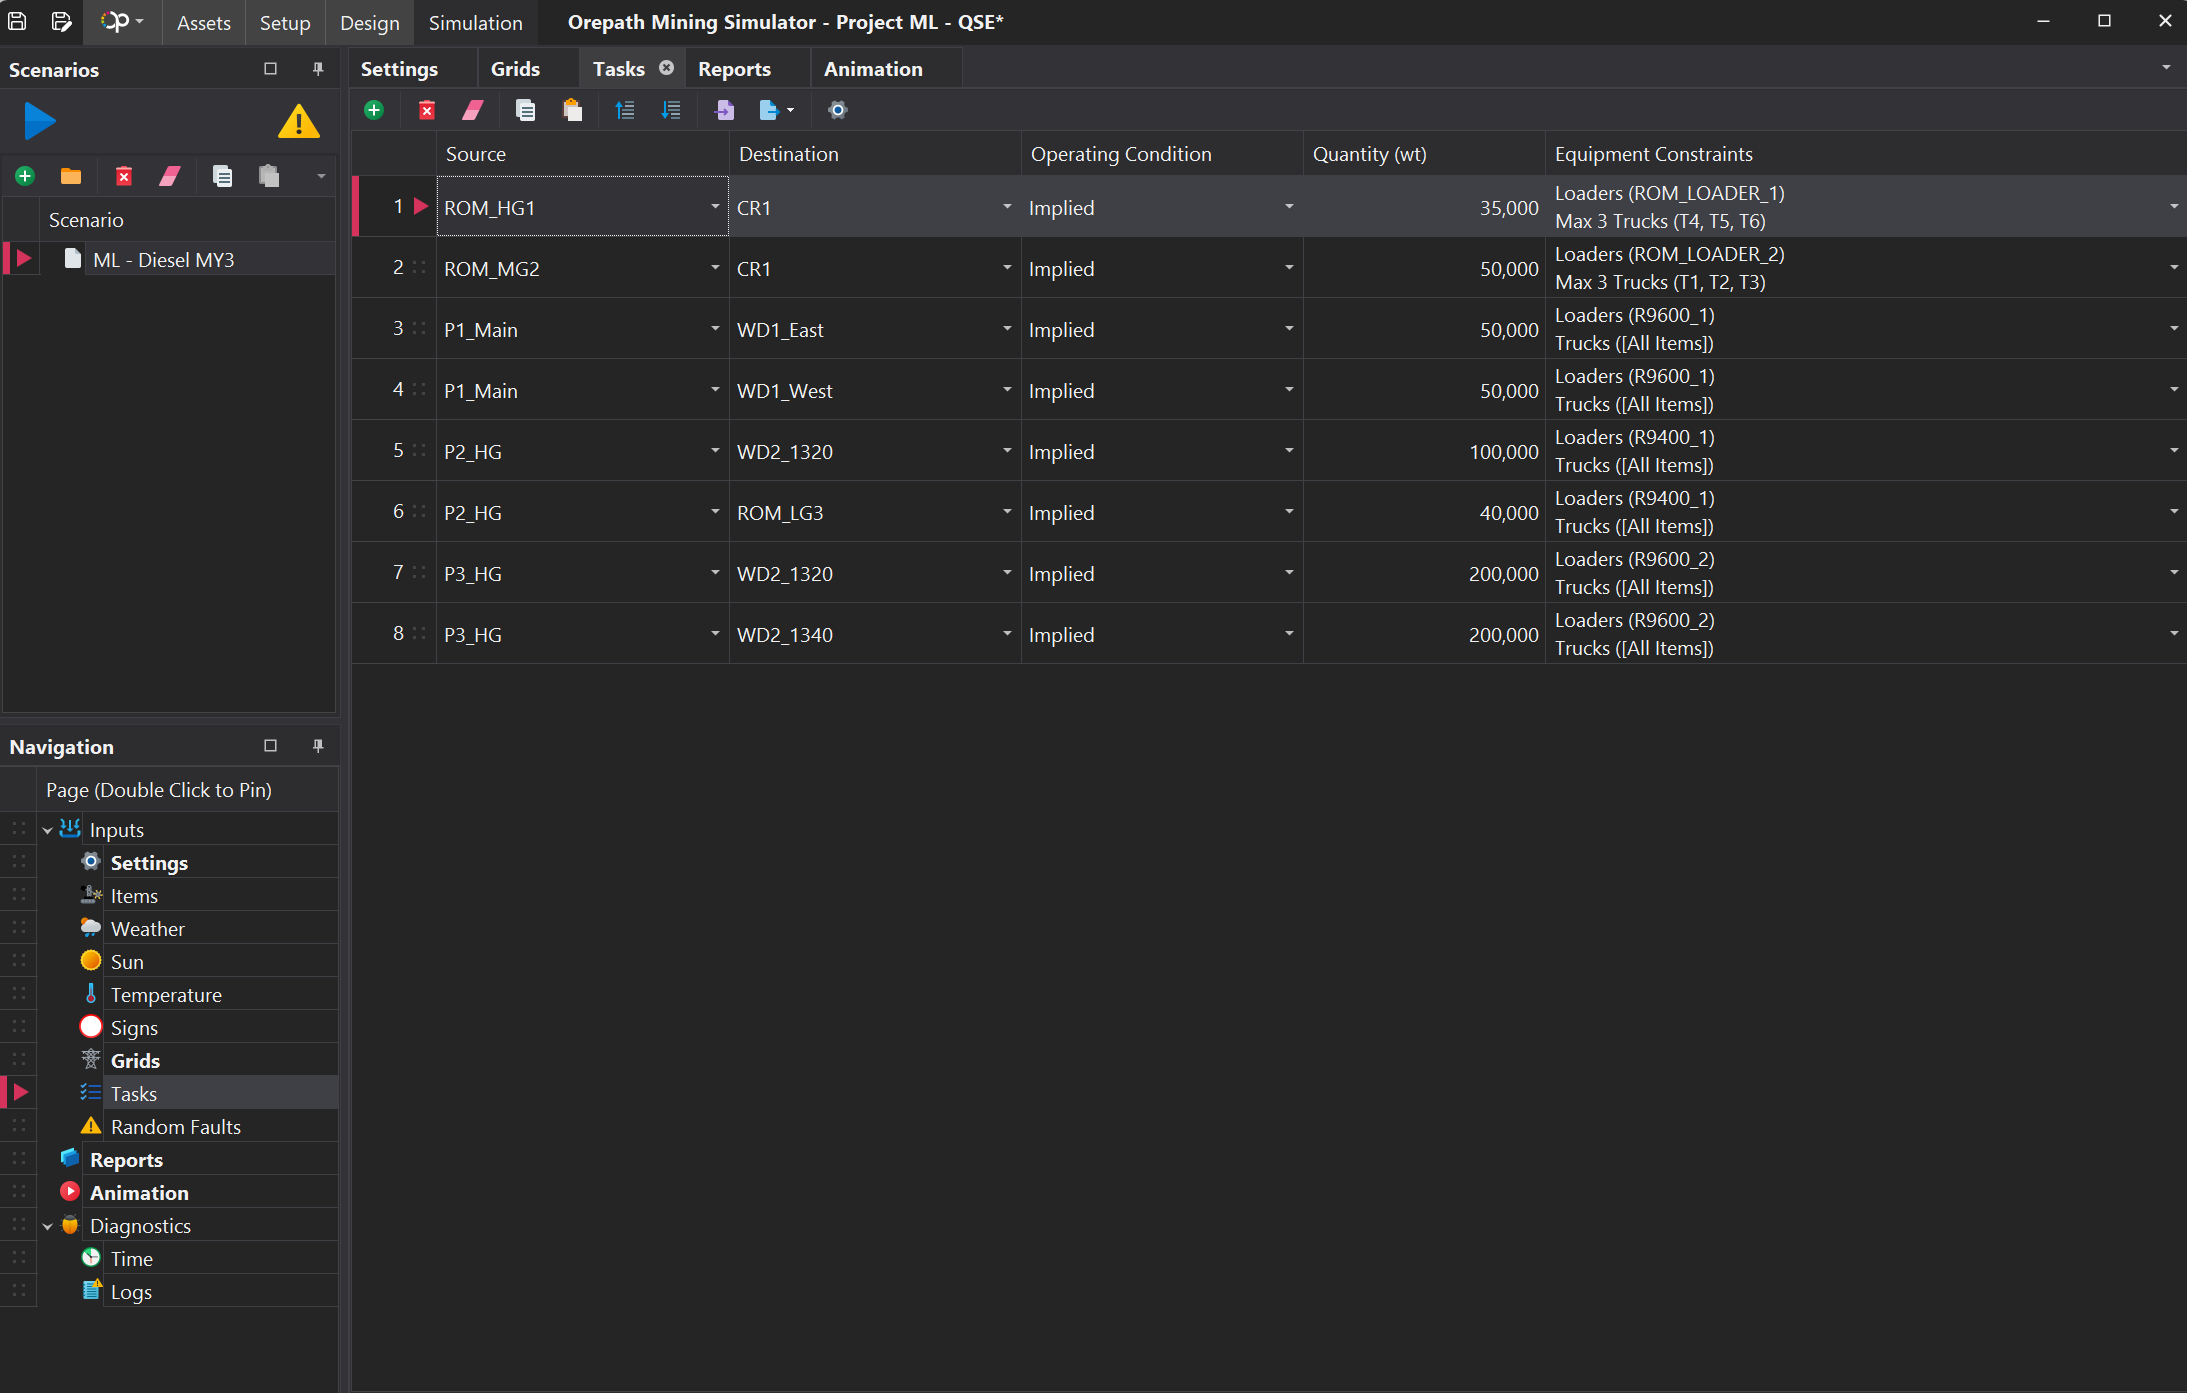
Tasks
Configure the Tasks for the simulation as per the image below:
Report
In the Reports menu, click on the Import button, browse to the Project ML Setup Parameters folder and import the .Reports file.
This will import 3 report templates called:
- Material Movement.
- Expit vs Rehandle.
- Ore vs Waste.
Running the Simulation
Once the simulation inputs and tasks have been configured, click on the blue Run Simulation button in the Scenarios pane.
Once the scenario has finished running, click on the Animation item in the Navigation pane to load up the Animation window.
Use the Time Controls to move through the simulation and playback the events in 20x speed where desired.
Examine the simulation and keep an eye out for strange behaviours, congestion and bottlenecks. After an initial examination, experiment with adjusting the equipment items, tasks and the road network at your leisure.